
Word macros can take almost any repetitive word-processing task and do it for you faster, in just a few keystrokes.
Here’s a classic example: You’ve received a document with incorrect formatting throughout. You know what to do—use Search & Replace to fix them all—but doing that manually would be tedious for a short document, and insane for a longer document. Here’s how to program macros to fix them all for you.
Note: It’s always best to create several smaller macros that perform a single function than one large macro that does it all. The primary reason for this practice is troubleshooting: If the macro fails, it’s much easier to locate and repair a single error than to debug a longer, more complicated macro.
Recording a macro is just like recording a song: You get ready to perform the task, you hit Record; you perform the task, then you hit Stop.
In Word, you record macros from the Developer tab. To set up the Developer tab, click File > Options > Customize Ribbon. In the “Customize the Ribbon” column on the right side, confirm Main Tabs is selected in the dropdown menu, then click the Developer checkbox below.
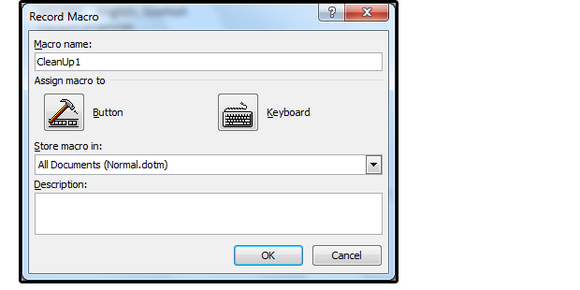
1. Select the Developer tab, then click Record Macro. Enter a macro name in the Macro Name field box. For our example, we’ll use CleanUp1.
2. Under Assign Macro To, click the Keyboard button.
3. The Customize Keyboard dialog box appears. Under “Specify keyboard sequence,” cursor over to “Press new shortcut key,” and enter a custom shortcut for this macro—a combination of Ctrl, Alt, or Shift and a keyboard character.
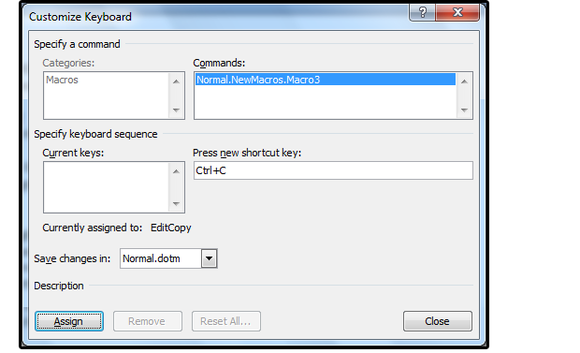
Most of the keyboard keys are already assigned to Microsoft Word’s internal macros, such as Ctrl+X for cut or Ctrl+V for paste. The “Currently assigned to;” line in the dialog box tells you whether the key combination is taken. If you can’t find enough unassigned keys, re-assign one from a shortcut you never use.
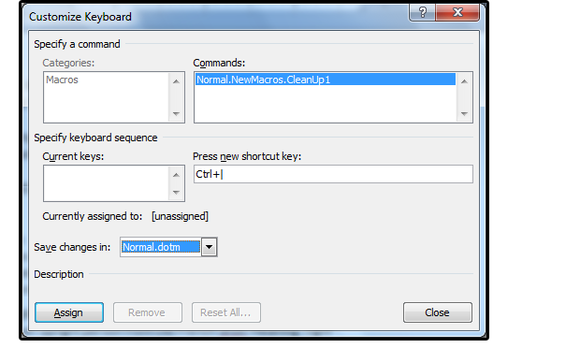
4. For this example, enter the following custom shortcut: Ctrl+ | (pipe, the vertical-line character above the backslash character on most keyboards). Note that this combination keystroke is not currently assigned. Click the Assign button, then click Close.
After you’ve assigned the key, Word returns you to the document screen. You’ll notice the macro r ecording buttons in the menu ribbon are active (that is, no longer grayed-out). Continue with the instructions below to finish recording this macro.
This first macro moves the commas and periods from outside to inside the quotation marks, a punctuation rule specified by all published style guides including Associated Press, Chicago, Oxford, Webster’s, and AMA.
Confirm you’re in recording mode, then…
1. Press Ctrl+H to open the Find and Replace dialog box, and click the Replace tab. Place your cursor in the “Find what:” field box and type ”. followed by the Tab key, which moves to the Replace With: field box. In that box, type .” and click Replace All, then OK.
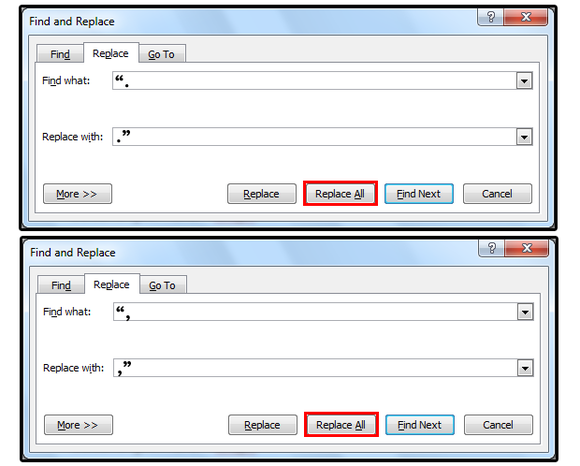
3. You’ll find yourself back in the “Find what:” field box. Starting from there, repeat the same process for commas outside of quotation marks.
4. Close the dialog box using the red button at the top-right corner, then click the Stop Recording button in the macro menu ribbon.
This macro removes all the extra spaces between words throughout the document. The process uses wildcard characters, which we’ll explain in more detail in another column. For now, get a taste of their power with the following directions.
1. Select the Developer tab, click Record Macro, then enter a macro name: CleanUp2. Click the Keyboard button. In the “Press new shortcut key” text box, enter a custom shortcut for this macro: Ctrl+Shift- Num + (press and hold Ctrl and Shift, press the + sign on the numeric keypad, then release all three keys simultaneously). Click the Assign button, then click Close.

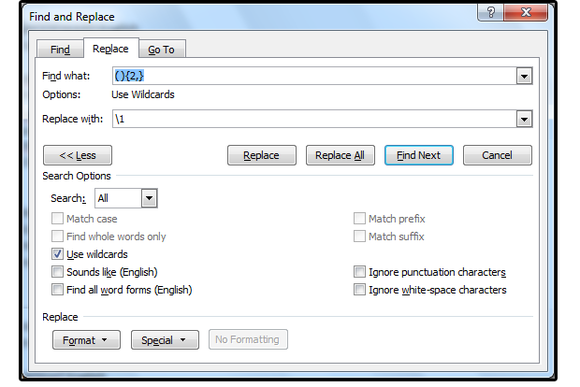
2. Press Ctrl+H to access the Find and Replace dialog box. When the box appears, click the More… button to display additional search options and special features. Under Search Options, click the Use Wildcards checkbox.
3. Next, enter the following keystrokes in the “Find What:” and “Replace With:” field boxes.
Find What: ( )
Replace With: 1
4. Close the dialog box using the red button at the top-right corner, then click the Stop Recording button.
 all the extra spaces between words" width="580" height="387" />
If you’d like to test your macro, select Undo (or click the Undo button on the Quick Access Toolbar; then rerun your macro; that is, press Ctrl+ Shift- Num + (simultaneously).
This macro removes all the extra line breaks throughout the document.
1. Select the Developer tab, click Record Macro, then enter a macro name: CleanUp3. Click the Keyboard button. In the text box under “Press new shortcut key.” enter a custom shortcut for this macro: Ctrl+ Shift- Num – (press and hold Ctrl and Shift, then press the minus sign on the numeric keypad, then release all three keys simultaneously). Click the Assign button, then click Close.

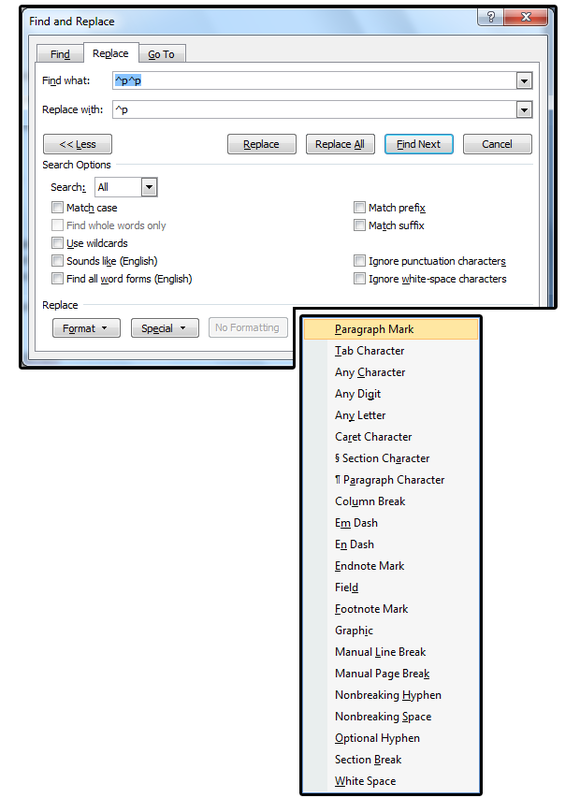
2. Press Ctrl+H to access the Find and Replace dialog box. When the box appears, click the More… button to display additional search options and special features.
3. Place your cursor in the “Find what:” field box, then click the Special button. Select Paragraph Mark, then select it again, resulting in two paragraph marks in the field box
Place your cursor in the “Replace With:” text box, then click the Special button. Select Paragraph Mark just once.
Note: You can also enter the paragraph mark yourself as the code ^p (using the caret symbol above the number 6).
 all the extra line breaks" width="580" height="798" />
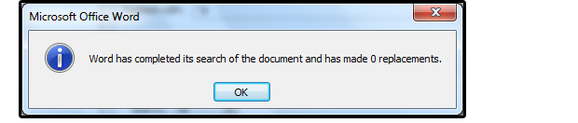
4. Click the Replace All button, then click OK repeatedly until the popup dialog says “Word has completed its search of the document and has made 0 replacements.”
Note: In this macro, I repeated this process three times. In most cases, that’s probably enough; however, if not, just run the macro again.
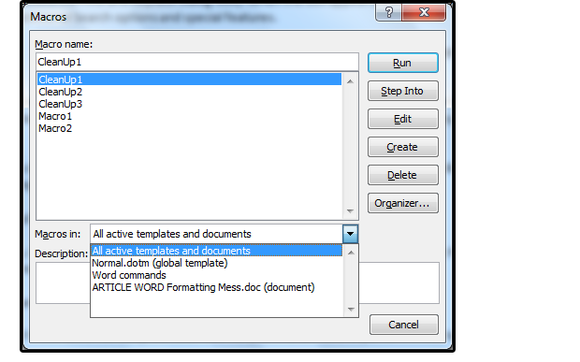
When you save your macro, the “Macros in:” dropdown menu will let you select where and when you want them to be available in Word. The default is All active templates and documents, and that works for most people. You can vary this macro to macro, of course.
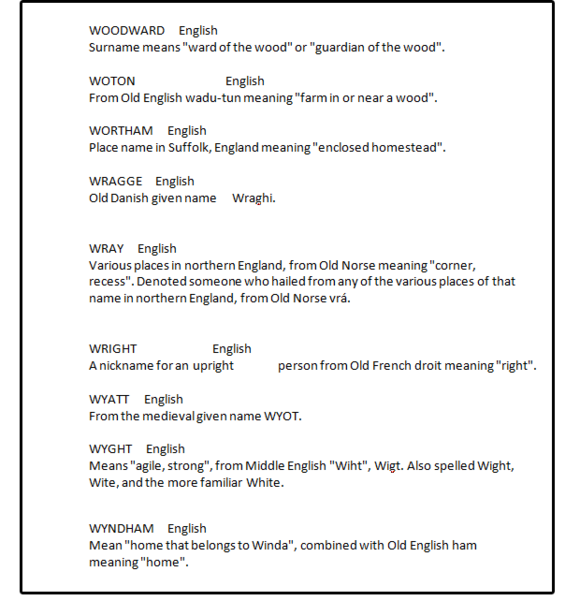
And here’s your reward: the finished, clean formatted document. Now you can try macros for other frequent tasks—feel free to experiment and find new ways to lighten your workload!